How to change the color of the file name in Windows? – a common question from Windows users. Despite a lot of properties and design convenience, one thing in Windows is missing – a feature that may give you control over the color of file names.
So, I can’t do this? It is possible to change the color of the actual file name, but it is a limited process. Read an article, and we will show you one method on how to change the color of the file name + alternatives how you can differentiate files by their icon colors.
- Changing the color of the file name (hack)
- Alternative solution: differentiate files by the color of an icon
Changing the color of the file name (hack)
The solution was first found on Seven Forums, but it is more a hack than an actual possibility of changing the color of the file name. Let’s explain this method step by step:
Step 1
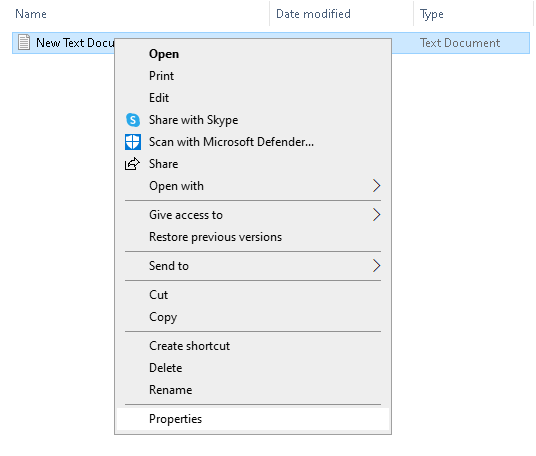
Open File Explorer and find the file you want to work with: change the name color.

Step 2
Right-click the file and choose “Properties”. Now you will see another window with various details.
Step 3
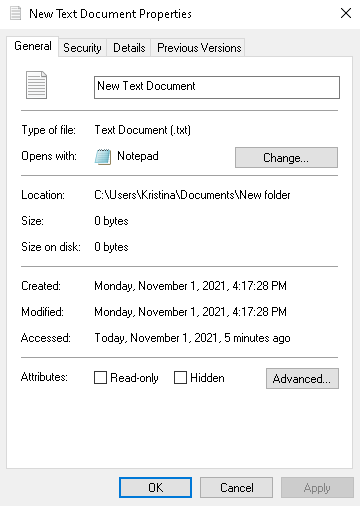
At the bottom of the Properties window in the “General” section, you will see a button – “Advanced”. Click on it!
Step 4
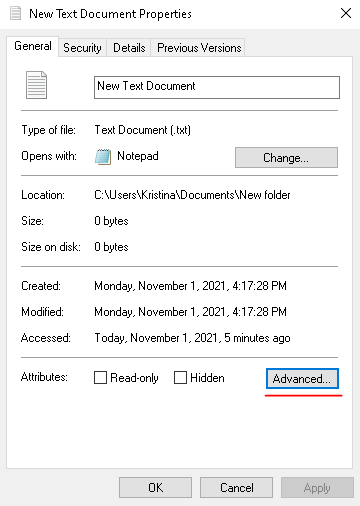
You will see a new sub-window with more options. The bottom two are of particular interest, as they control how the file name displays.
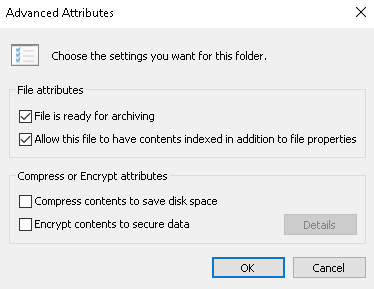
Step 5
Choose “Compress contents to save disk space”, or “Encrypt contents to secure data”. You can’t tick both. Then click “OK”, return to the previous window, and again click “OK”.
Step 6
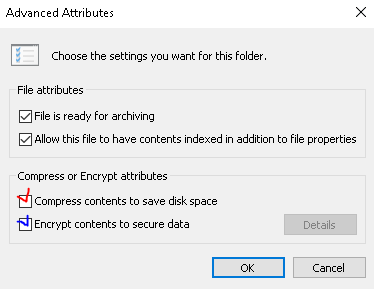
Besides what you checked, the file name should be colored. If you tick “Compress contents to save disk space” – it will appear as blue. If it is “Encrypt contents to secure data” – the color will be green. It is impossible to change the specific colors they display – you have only green and blue.


+ Also, when encrypting a file, Windows will offer to encrypt the entire folder or. It’s up to you.
Compressing the file itself does not affect access or editing. But file encryption has a risk if you don’t create a copy of the encryption key. Better to use – “Compress contents to save disk space”. So the ability to change the color of the text in a file is awkward, but it does exist.
Alternative solution: differentiate files by the color of an icon
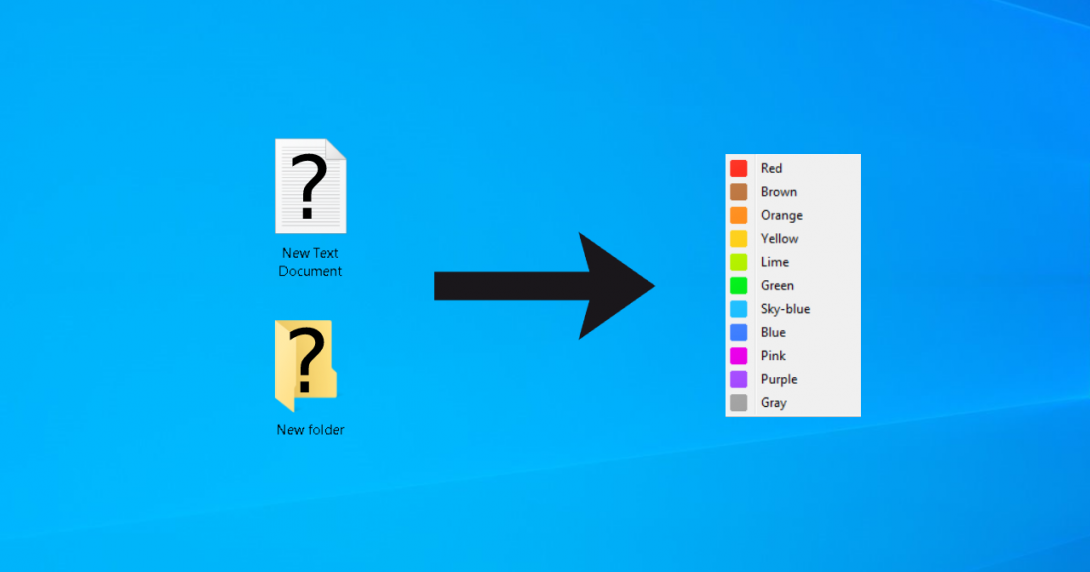
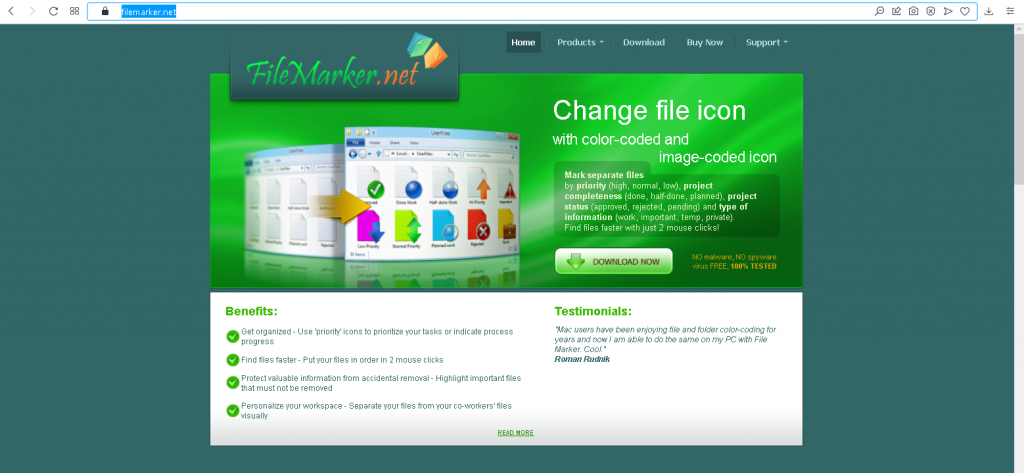
But we can consider an alternative. Maybe you’d better change the icon of a file or folder, and it will allow you to get what you want? If you want to visually sort your documents, or personalize your workspace – there are easier ways. You can change the color of the icons themselves, using color-coded utilities: FileMarker.NET for files and Folder Marker for folders. It can be done in one click and gives more than two color variations. Let’s go through the steps.
Download the utility for changing the color of the file:
- Go to an official site – change the color of the file software
- Click on the Download button

- Install it
CHANGING THE COLOR OF THE FILE:
- Select the file you want to change color for
- Right-click on this file
- Choose the color from the ‘Mark File’ sub-menu.
- See the result
The result:

Download the utility for changing the color of the folder:
- Go to an official site – change the color of the folder software
- Click on the Download button
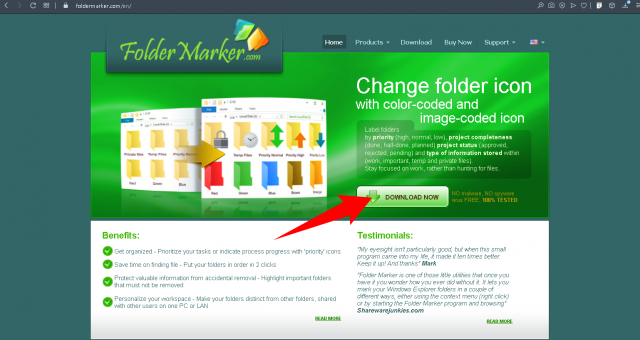
- Install it

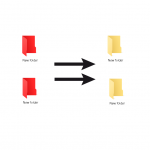
CHANGING THE COLOR OF THE FOLDER:
- Select the folder you want to change the color for
- Right-click on this folder
- Choose the color from the ‘Mark Folder’ sub-menu.
- See the result

Conclusion:
Now you know that you can change the color of the file name with the hack. Or just use the alternatives – change the color of the file or folder with special utilities. Use these methods to visually sort your documents!
Also, check the article about – how to change folder color in Windows.

The hack for changing the color of the file name does not work for any Windows 10 file names for me. None at all.
The File Marker software will change the file name marker in some file names only: some .txt files, almost no .ppt and .ppx files, and frequently gives the error message:
Your file system (exFAT) is not supported.
Customize icon on drives, formated in NTFS.
GRS