We love to help genealogy researchers to simplify research work and organize computer docs by color-coding with our program. But offline stuff should be organized as well, so we want to share useful tips on how to clean up files, organize thumb drivers to prevent them from losing and mark handouts for a research process. If you are into the genealogist process or just wondering how to organize handouts, then read on.
What is MUD Log, why is it better to use Google Spreadsheets instead of standard Excel for creating a log, how to name USB, and other tips – all the answers you can find down below.
We were inspired by this cool video.
What can you read about?
- 1 TIP – How to keep your print documents in order and how MUD logs can help
- 2 TIP – How to organize USB sticks to prevent them from losing
- Conclusion
1 TIP – How to keep your print documents in order and how MUD logs can help
First let’s answer the question – Do you know what a MUD log is?
- No ( read What is MUD Log? )
- Yes (go to What to do?)
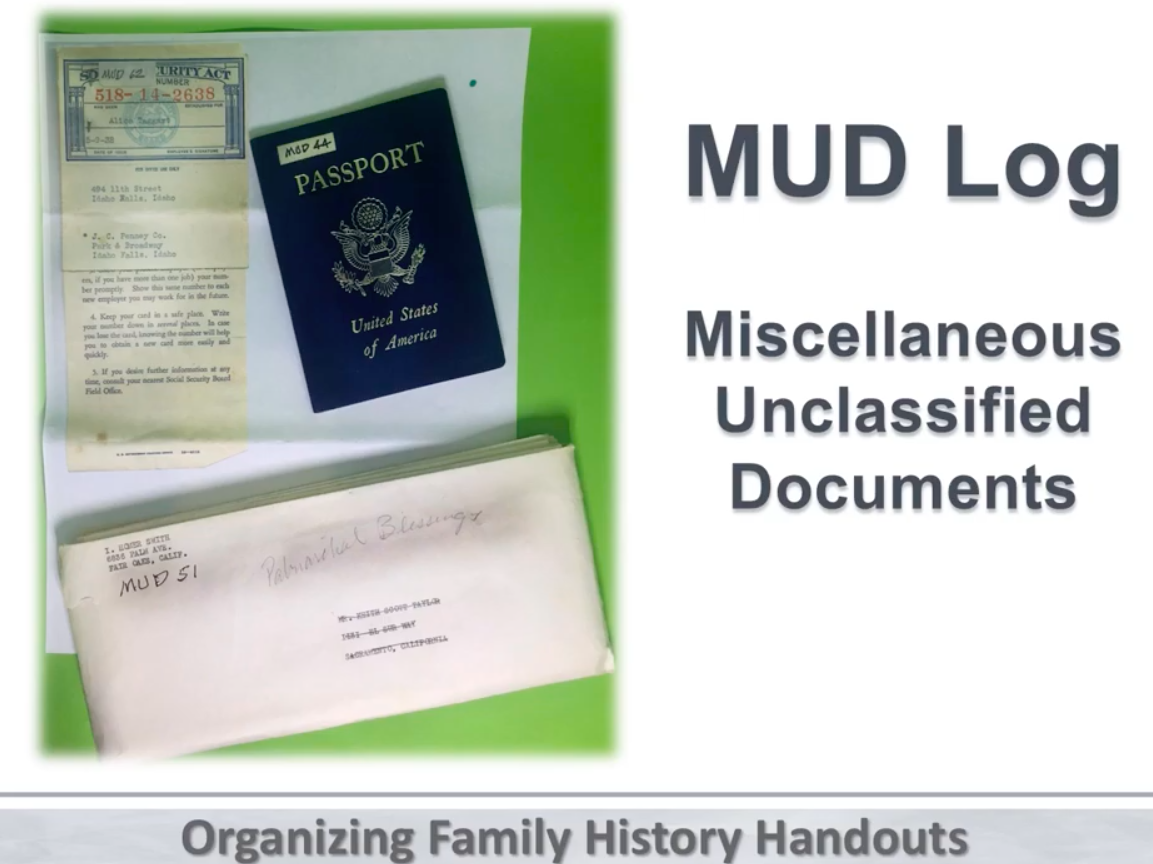
– What is MUD Log?
Let’s start with a short story:
One architect and business owner has an excellent organizational sense. He stores dozens of files, stacks, and documents at home. To keep the records named, he put a number in the corner of each item and kept a log of numbers. He uses the same system as in 1985 in Congress that used documents called miscellaneous documents. So he uses a simple abbreviation for his organization – MUD Logs. Where U – unclassified means not requiring a security clearance, not secret or confidential.
It’s a simple but useful idea. Why not use marking practice in organizing family history hangouts? Let’s number and make a structure of them step by step.
– What to do?
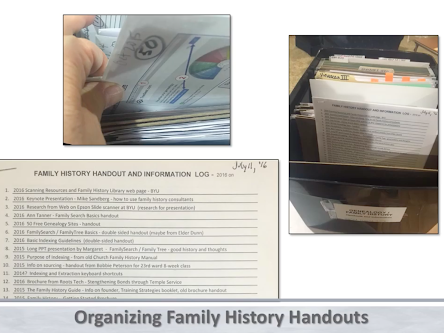
Number MUD log documents and marked handouts files are pretty easy and help to see a clear file structure with the explanation of what is hidden inside.
- Read the instruction down below (with the use of Excel) :
- Find or buy a file box.
- Label the box Genealogy/family history for recognition.
- Create a log in Excel. File the items by the number of the item and type the description containing – what is it, date, and where you got this.
- Mark that number in the actual item (in the upper left corner for comfort use).
- By searching in Excel you can easily find items by description.
For example: You want to find a file on how to produce furniture. Hit ctrl+F and type the word “furniture” in the resulting box. It took you to that document. Now you can see the number of the item and find it in the Genealogy/family history box.
– Go to a new level and replace Excel with Google Spreadsheets. We prefer Google Spreadsheets because:
- you can supplement it from a mobile phone (mobility use, add or search without location binding)
- history is stored, everything in the cloud, no need to worry about the place on the computer
- several people can edit at the same time on several computers
- also, if you don’t need to change something regularly, you can print these files and keep it in the file box so you can find things without turn the computer on
files exactly this way
2 TIP – How to organize USB sticks to prevent them from losing
Paper files are as vital as thumb drives for researchers. Thumb drives are like rabbits, and you can’t remember what is on which one and where they are. So, another trick is for USB sticks. Everyone has more than one thumb drive lost somewhere in the pocket, and how to organize all USB sticks to prevent them from losing is a good question.
– What to do?
- Number each USB stick with a sticker (use a fine sharpie marker to write the number on the label)
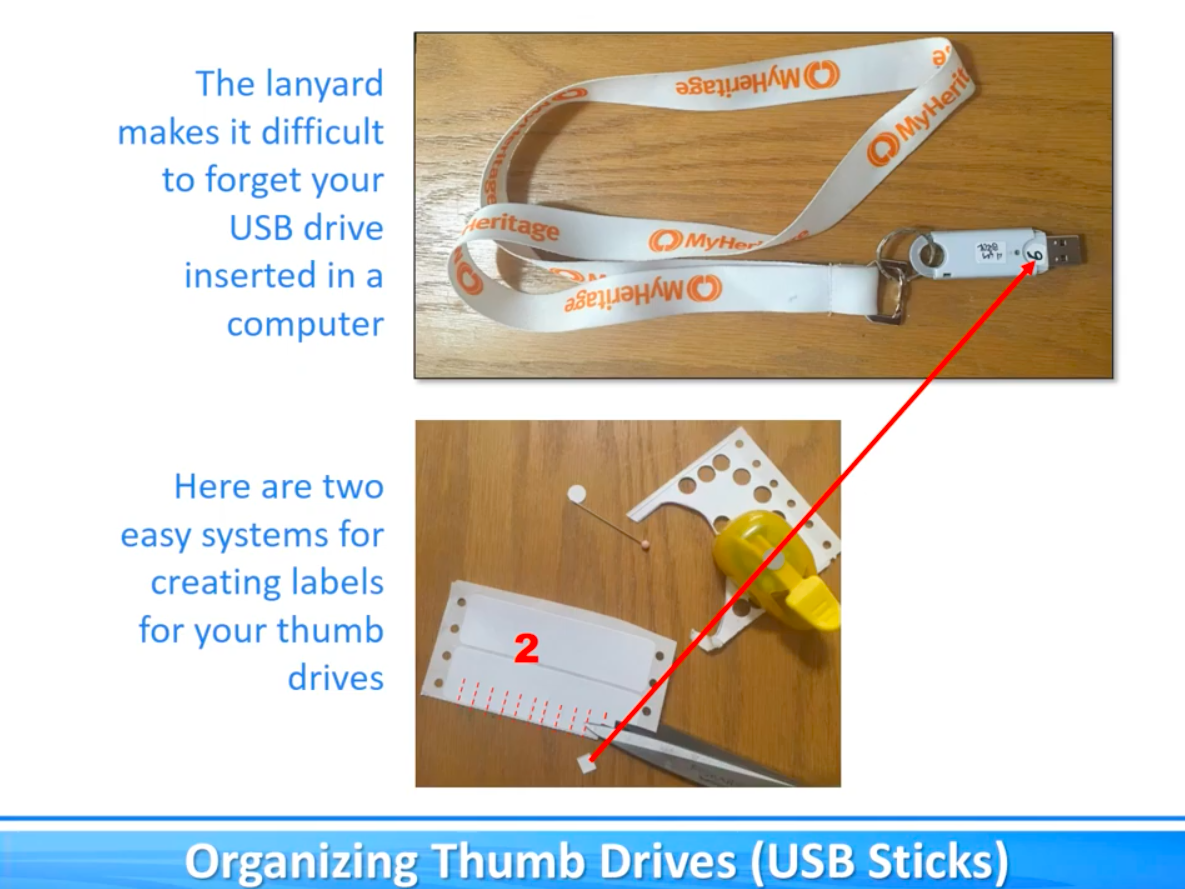
- Give each USB a name on the computer
Named stick is helpful because when you have several drives inserted, you can tell which disk you are working on by the title, which appears in the window. When you enter the stick, and this name or number also corresponds to the real number on the stick.
For example: 18MARG-16G
Where:
- 18 – USB Stick Assigned Number
- MARG – USB Stick Owner
- 16g – USB Stick Size
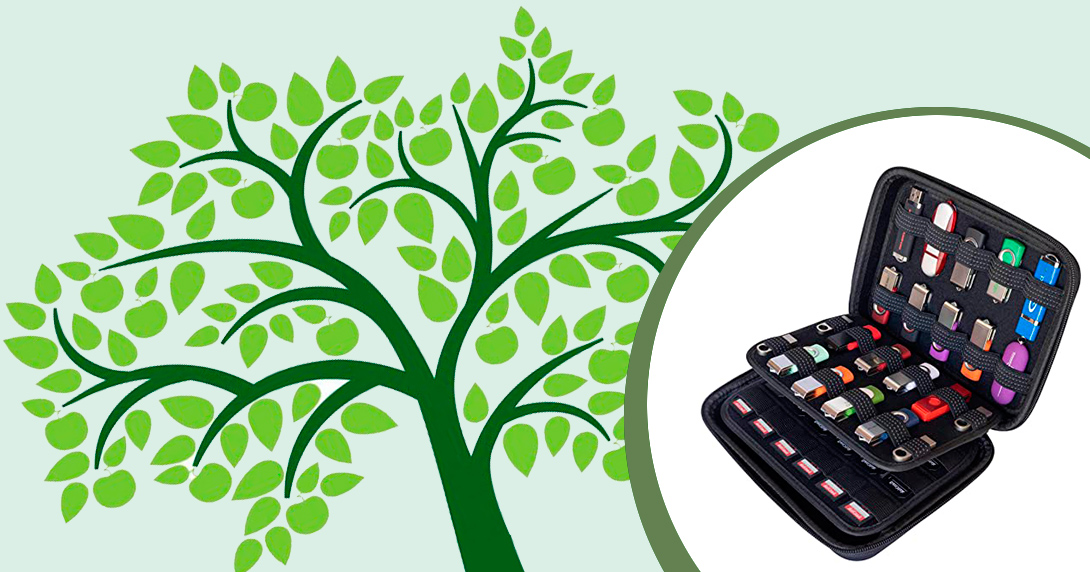
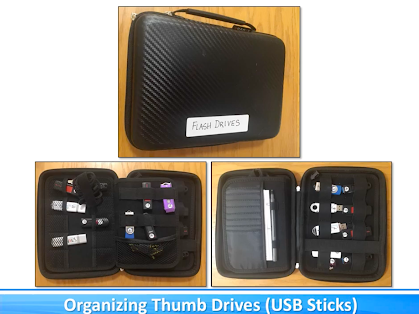
- Store USBs in a container for multiple sticks
A thumb drive case can be purchased in many places. Once created, you can physically input on the record if you want rather than doing it on the computer. There is also a place inside for a pin that can be used to write on the log.
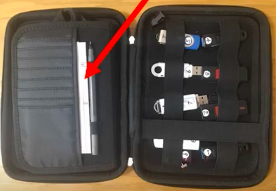
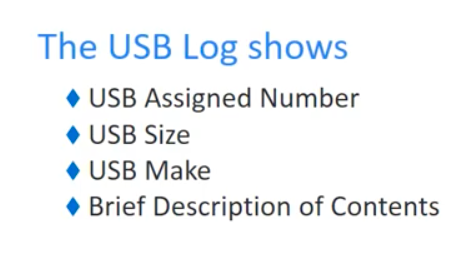
- Create a log of USB thumb drives showing concerning information for each USB
After you’ve marked all thumb drives, it is time to create a log with columns and parameters to differ each drive from one another:
- The stick owner of an abbreviation of the name;
- The stick size;
- Make a brief description of what is inside.
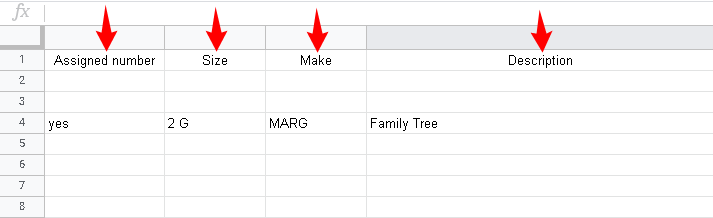
An example of such a table below:
– How to make data on USB even more understandable
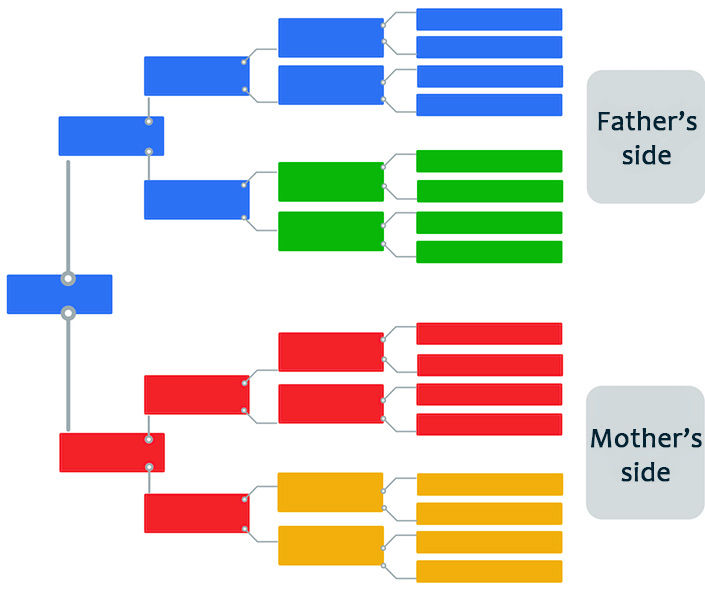
In addition, the data on the flash drive can be made more understandable if you color the folders or files by the way we already mentioned. It is convenient to color files and folders, for example, by lines or relatives – a blue color to indicate your grandfather’s relatives in your father’s line; green to indicate your grandmother’s relatives in your father’s line.
You can read about this more in our article – HOW TO USE COLOR-CODING IN GENEALOGICAL RESEARCH.
In conclusion
Now you know how to store genealogical stuff on flash drives and how to put pieces of paper into files so that you can easily find where is what you need. More insights about how to organize genealogy research you can see in the full video from the author https://youtu.be/732owNrmusk
I got a binder and put those plastic sheet protectors into it. I keep them in two places in the house, in my pocketbook, and in my safe deposit . The first step of any organizing project is to create a manageable timeline for getting it .