3 Methods Every Folder Marker User Should Know About
We received a comment about change-folder tool – Folder Marker :
“ The ability to select multiple folders at once could be greatly improved. Currently, multiple is add one, then add another, then add another ”
The commentator isn’t right about Folder Marker’s abilities. There are 3 ways how to change multiple folders at once, but not everyone knows all of them. That’s why we decided to write a detailed guide, so you know how to deal with multiple folders comfortably in Folder Marker. I will show you how!
- 1) Drag-and-drop multiple folders on the Folder area
- 2) Select several folders and right-click on them
- 3) Add one, then add another (was mentioned in a comment)
1) Drag-and-drop multiple folders on the Folder area

- Open Folder Marker by clicking on the icon on your desktop/ in your start menu. You will see a program window.
- Click on the “Folder” menu item. Tick “Multiple Folders”. You will see an area under “1. Folder” changed and appeared new buttons: “Add”, “Remove”, “Clear”.
- In this mode, drag-and-drop all the necessary folders into the “Folder” space.
- Choose the icon to change the folders.
- Click “Apply” on the right down corner of the program window.
- Now you can see that all folders added on 3rd step customized at once.
2) Select several folders and right-click on them
You can customize several folders at once even without opening Folder Marker.
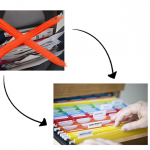
- Select several folders you want to label in Windows Explorer, and right-click the selection. You will see the popup menu with the Mark Folder entry.
- Select Mark Folder, and then the icon you want to apply.
- The icon is applied to the selected folders all at once.
3) Add one, then add another (was mentioned in a comment)

This method is the most time-consuming but allows you to change multiple folders located in different places on your computers.
- Open Folder Marker by clicking on the icon on your desktop/ in your start menu. You will see a program window.
- Click on the “Folder” menu item. Tick “Multiple Folders”.
- You can see the new buttons. Click “Add” and find the needed folder in a new window. Click “OK” to add.
- Repeat this action. Add another folder, then add another…
- Choose the icon to change the folders.
- Click “Apply” on the right down corner of the program window.
- Now you can see that all folders added on 4th step colorized at once.
To sum up, briefly go over the points. You can:
- drag-and-drop all the necessary folders into the “Folder” space
- right-click the selection and choose the icon you want to apply with the context menu
- add one, then add another by repeating actions
You are ready to continue working with Folder Marker!